Send requests to an endpoint
After deploying a Serverless endpoint, you need to know how to interact with it effectively. This guide covers everything from testing your endpoint in the console to sending requests programmatically and configuring advanced options.
Understanding request structure
Before sending requests, it’s important to understand the basic structure. All requests to Runpod endpoints must:
- Include an
inputobject that contains the parameters for your worker’s handler function. - Be formatted as valid JSON.
- Include your API key for authentication (unless sent from the Runpod console).
Basic request structure
Every request must include a JSON object containing an input key. This is the minimum valid request:
The exact parameters inside the input object depend on your specific worker implementation. Check your worker’s documentation for the required and optional parameters.
Testing methods
Test in the Runpod console
The quickest way to test your endpoint is directly in the Runpod console:
- Navigate to the Serverless section.
- Select your endpoint.
- Click the Requests tab.
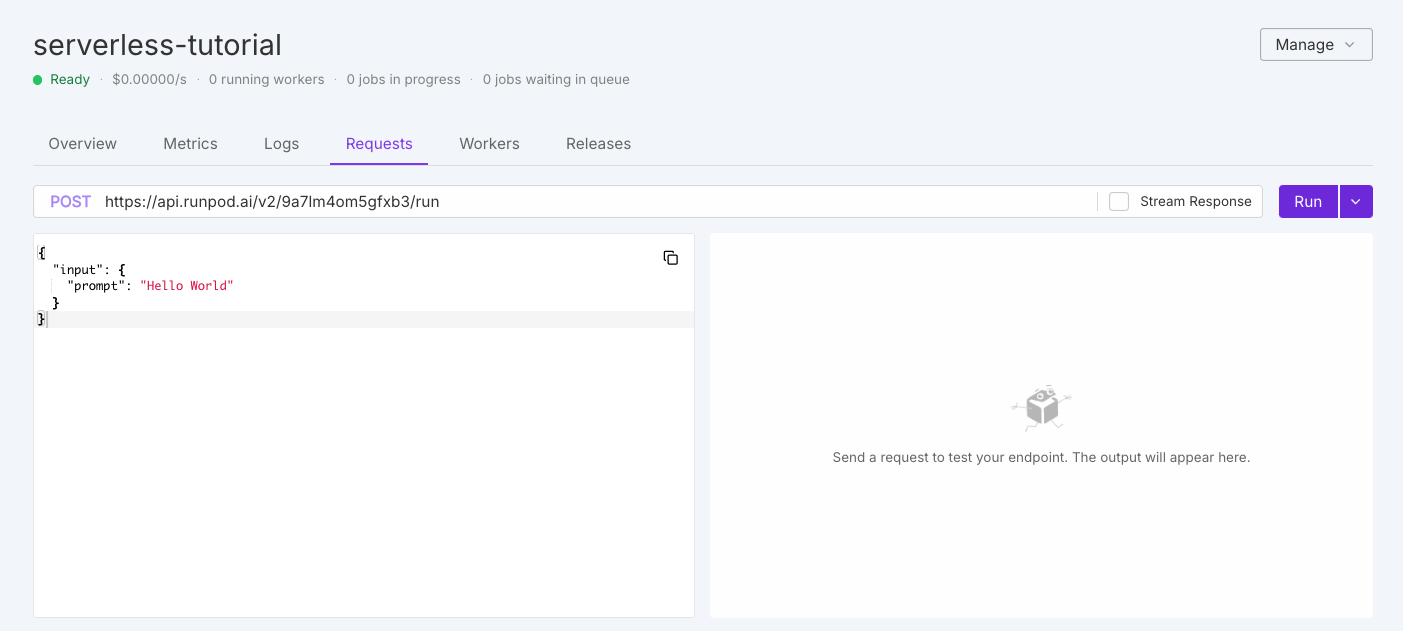
You’ll see a default test request in the editor:
You can modify this request as needed, then click Run to test your endpoint. On first execution, your workers will need to initialize, which may take a moment.
The initial response will look similar to this:
After processing completes, you’ll see the full response. If there are any errors, the console will display error logs to help you troubleshoot.
Send requests programmatically
Once your endpoint is working correctly, you’ll likely want to integrate it with your applications. Here are examples using common methods:
For command-line testing or scripting:
Replace [ENDPOINT_ID] with your endpoint ID and [YOUR_API_KEY] with your Runpod API key.
Advanced configuration options
In addition to the required input object, you can include optional top-level parameters to enable additional functionality.
Webhook notifications
To receive notifications when your job completes, specify a webhook URL:
When your job completes, Runpod will send a POST request to your webhook URL containing the same information as the /status/{job_id} endpoint. Your webhook should return a 200 status code to acknowledge receipt. If the call fails, Runpod will retry up to 2 more times with a 10-second delay between attempts.
Execution policies
By default, if a job remains IN_PROGRESS for longer than 10 minutes without completion, it’s automatically terminated. This default behavior keeps a hanging request from draining your account credits. You can manually control job execution behavior with policies:
Policy options include:
| Option | Description | Default | Constraints |
|---|---|---|---|
executionTimeout | Maximum job runtime in milliseconds | 600000 (10 minutes) | Must be > 5000 ms |
lowPriority | When true, job won’t trigger worker scaling | false | - |
ttl | Maximum queue time in milliseconds | 86400000 (24 hours) | Must be ≥ 10000 ms, max 1 week |
Setting the executionTimeout in a request overrides the default endpoint setting for that specific job only.
S3-compatible storage integration
For endpoints that need to work with large files, configure S3-compatible storage:
Where:
[BUCKET_NAME]is the name of the bucket you want to use.[BUCKET_ENDPOINT_URL]is the endpoint URL of your S3-compatible storage.[BUCKET_ACCESS_KEY_ID]is the access key ID for your S3-compatible storage.[BUCKET_SECRET_ACCESS_KEY]is the secret access key for your S3-compatible storage.
This configuration is passed directly to your worker but is not included in the response. Your worker must contain logic to use this information for storage operations.
The S3 integration works with any S3-compatible storage provider, not just AWS S3. You can use MinIO, Backblaze B2, DigitalOcean Spaces, and other compatible providers.
Asynchronous vs. synchronous requests
Runpod endpoints support two types of requests: synchronous and asynchronous. To learn about them in more detail, see Endpoint operations.
Synchronous requests (/runsync)
Synchronous requests wait for the job to complete and return the result in a single response:
/runsync works best for:
- Short-running tasks (under 30 seconds).
- Interactive applications where immediate results are needed.
- Simpler client code (no need to poll for status).
Asynchronous requests (/run)
Asynchronous requests return immediately with a job ID, allowing your application to continue while the job processes in the background:
/run works best for:
- Long-running tasks.
- Batch processing.
- Workflows with webhooks.
When using asynchronous requests, you’ll need to check the job status using the /status/{job_id} endpoint or configure a webhook to receive the result.
Error handling
When sending requests, be prepared to handle these common errors:
| HTTP Status | Meaning | Solution |
|---|---|---|
| 400 | Bad Request | Check your request format and parameters |
| 401 | Unauthorized | Verify your API key is correct and has permission |
| 404 | Not Found | Check your endpoint ID |
| 429 | Too Many Requests | Implement backoff and retry logic |
| 500 | Internal Server Error | Check endpoint logs; worker may have crashed |
Implementing proper error handling and retry logic will make your integrations more robust.
Next steps
Now that you’ve learned how to send requests to your endpoint, you can: